
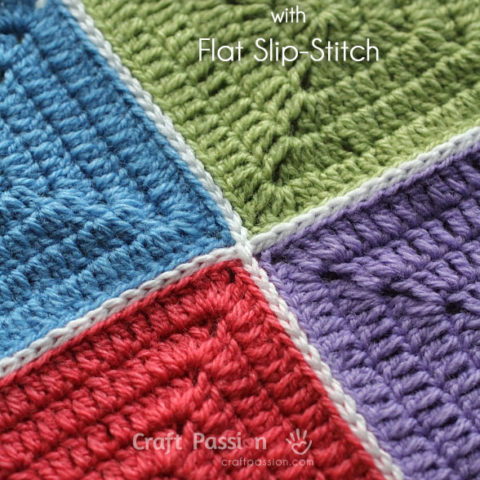
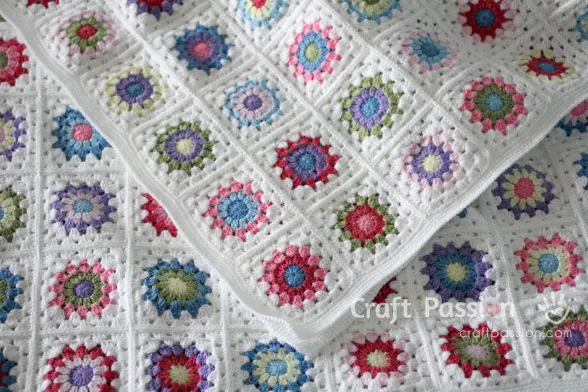
This flat slip-stitch granny square join is the joining method I used on the Sunburst Granny Square Blanket (see picture below). It gives flat yet clearly defined vertical and horizontal lines that frame up the squares.
[Update March 31, 2015: If you are interested in the solid granny square crochet pattern, please click here]
The method is similar to the slip stitch join I did on the African Flower Purse, but instead of joining at the back of the squares, this flat slip-stitch method is working from the front of the squares.
There are plenty of joining methods for the granny square, choose the best to suit your project. Perhaps I should make a roundup to show you some of those popular and commonly use joining methods. I hope this will come soon [Update: Click here to choose from the 12 ways to join your granny square]. Stay tuned! While waiting for that, please click page 2 for the detailed tutorial of this flap slip-stitch method.

Flat Slip Stitch Granny Join
This flat slip-stitch granny square join is the joining method I used on the Sunburst Granny Square Blanket (see picture below). It gives flat yet clearly defined vertical and horizontal lines that frame up the squares.
Enjoy crocheting them!
Materials
- Any Granny Square
Tools
- Crochet Hooks
Instructions
- Granny squares (blocked), hook, and yarn for the joining.
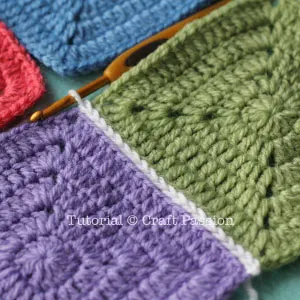
I used 4 squares in different colors and white yarn to join so that you can see the stitches clearly.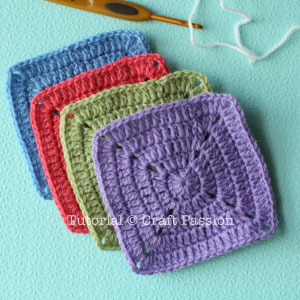
- a. Place the squares with the right side showing up as we are going to work on the right side of the square.
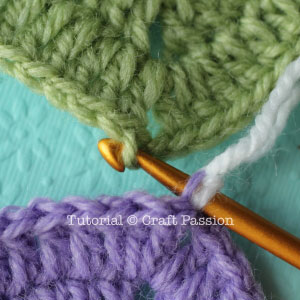
b. Make a slip knot on the hook to begin, insert the hook into the back loop of the corner stitch of the first square, bring a loop out and make a slip-stitch.
Note: If your squares have 2 chains at the corner (like mine), pick the chain stitch just before your first double crochet stitch on the edge that you are going to join.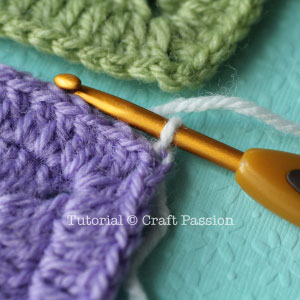
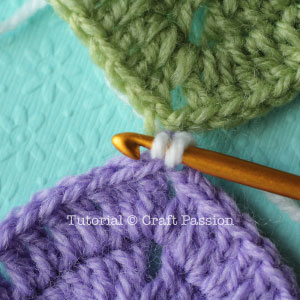
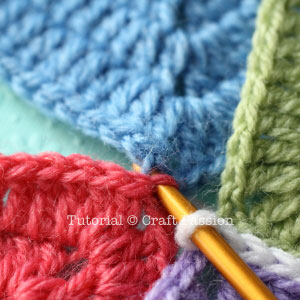
- Insert the hook into the same back-loop corner stitch from front to back.
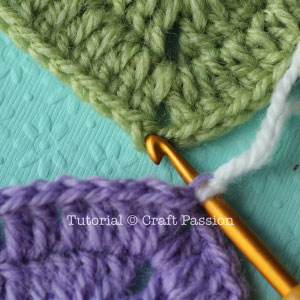
- Insert the hook into the back loop of the corner stitch of the second square, from front to back too.
- The white yarn should be always at the bottom of your work. Now, hook the white yarn and bring it up from the second square loop followed by the first square loop.
- Slip stitch to the first loop on the hook.
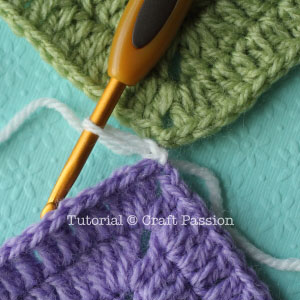
- Repeat the process on the second pair of stitches and so on.

- Continue until you reach the corner stitch right after the last double crochet stitch on this edge.

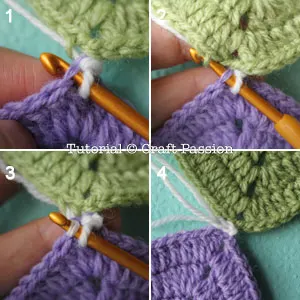
- Bring in squares 3 and 4, continue like the beginning of squares 1 and 2 except that you don’t have to make a slip knot onto the hook.
- Continue joining stitch on square 3 and 4 till the end.
- If you have more squares to join along the way, continue to do so until you reach the desired pieces of a granny square in the row. fasten off.
Repeat the same to complete all the row seaming for the whole project before you proceed to join the column (vertical lines).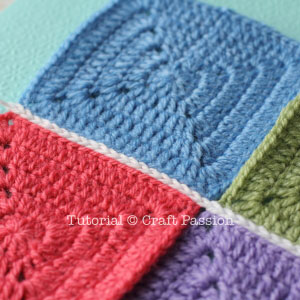
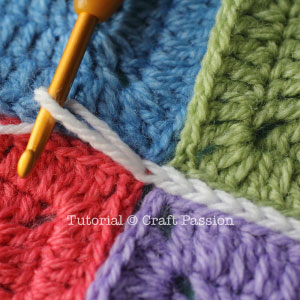
- Follow the same instructions when you do the column join until you reach the end of your first square.
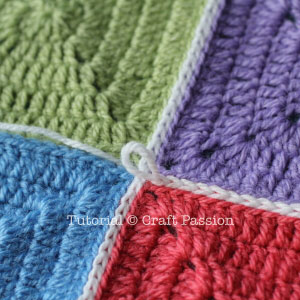
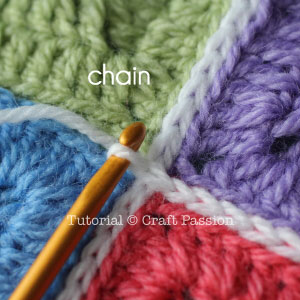
- Make a chain stitch to cross over the row joint and repeat the same whenever you need to cross the following row joints.
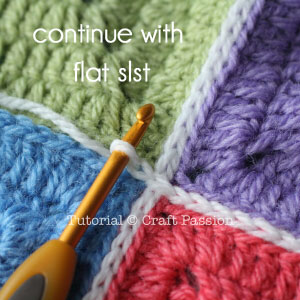
- Continue with the normal flat slip-stitch until you reach the end. Fasten off.
- Here is an example of a 4-square join.


- This is how the joint looks like at the back of the squares.
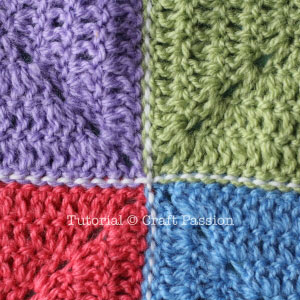
Simply love the neat and tidy seam this Flat Slip Stitch method gives to the granny squares.
Virginia Copping
Saturday 4th of July 2020
Very informative I really like this join. I will use it on my next blanket. Thank you for sharing.
Bernadine Philpott
Friday 11th of October 2019
Can one use the flat stitch joining for knitted squares?
Craft Passion
Sunday 13th of October 2019
It is possible, as long as you can pick up stitches from the edges of your knitted squares. Pay attention to the tension of the flat slip stitch so that it doesn't affect the length of the joins.
Betty Spencer
Tuesday 25th of June 2019
I have a friend who has approx. 136 granny strips but cannot figure out how to join them together on the ends. They are approx. 3 " wide and 6 " long. She says they bunch up when she tries to crochet the ends together. It is an older pattern and the pattern did not include how to put the ends together. Any help is appreciated. thank you...
Annette Toomey
Tuesday 12th of June 2018
Thank you!
Shai
Tuesday 10th of October 2017
Thank you for this post! I am making my first ever blanket with granny squares and it will be 17x25 (425 squares total!). I've been wondering how I will seam all those squares together. This method is very appealing and is likely what I will do in the end. Thanks!