How To Make Fabric Intrecciato Weave
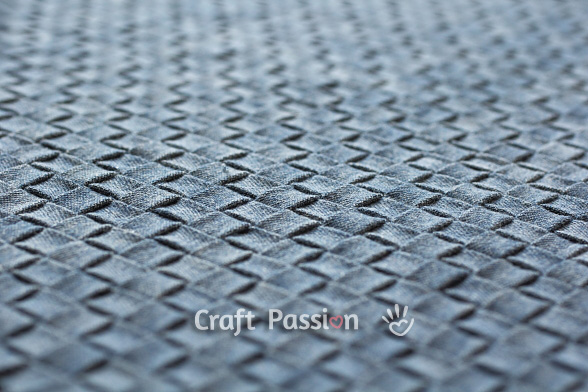
Lately, I've been really into creating woven patterns with all sorts of craft materials. In addition to making a knit messenger bag using the Entrelac knitting pattern, a cozy basketweave crochet blanket, a colorful woven rag rug using old sheets, and even trying my hand at easy basket weaving, I'm now excited to be working on crafting an Intrecciato weave fabric using lightweight denim from my old overalls. Note: Intrecciato means interlace/braided/weave in Italian.
This post may contain affiliate links, and we may earn a commission on purchases made through them at no extra cost to you. ❤️ Thank you!
Even if you're not a Bottega Veneta fan, you've probably spotted their iconic woven texture on handbags and purses. It's called the Intrecciato Weave, and it's the brand's signature style that's been popular since the early 2000s.
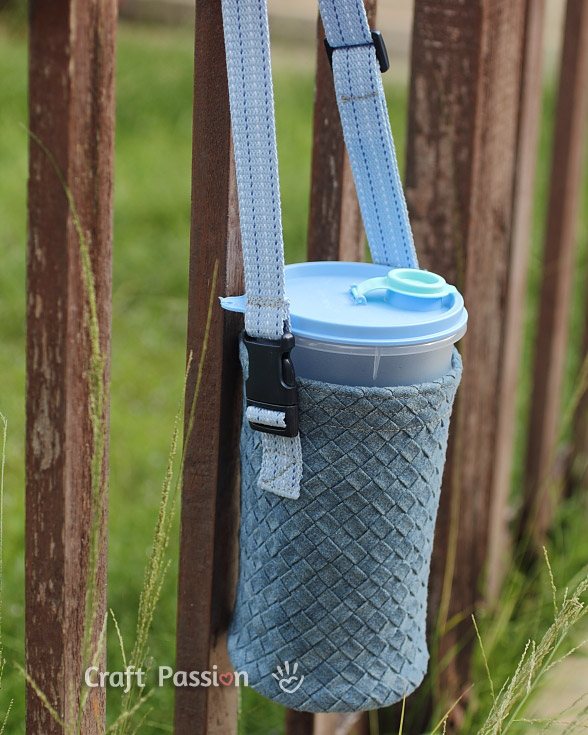
I've put together a detailed tutorial on weaving fabric strips using lightweight denim or cotton, and I used it to make a cool water bottle holder. If you're keen on making your own water bottle holder, I've got a step-by-step sewing tutorial for you as well!
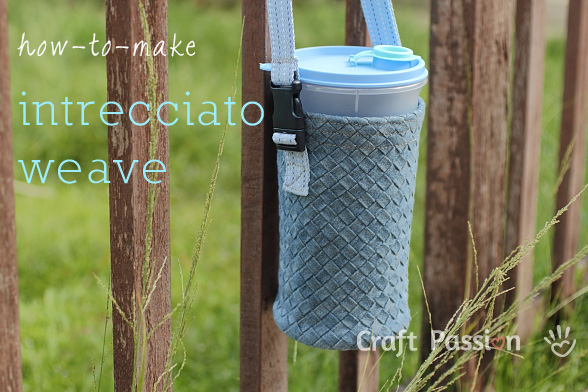
There are several ways to weave fabric strips. This tutorial offers a neat-looking Intrecciato Weave fabric piece. Though you need to invest some time in preparing the strips, it is worth the time!
Get ready with some lightweight denim or cotton, some tools, and gadgets listed in the tutorial section, and you are good to go. By the way, I am using a Clover Bias Tape Maker – 9mm (⅜″) to make the strip. If you want a wider strip, you can always use a wider size.
Hope you will enjoy making this beautiful Bottega Veneta-inspired Intrecciato Weave by using fabric.

How To Make Fabric Intrecciato Weave
This is the tutorial on how to make fabric Intrecciato Weave by using lightweight denim strips). Intrecciato Weave is made popular by Bottega Veneta, a famous brand that produces luxury leather goods.
There are several ways to weave fabric strips, this tutorial offers a neat-looking Intrecciato Weave fabric piece. Though you need to invest some time in preparing the strips, it is worth the time!!!
Hope you will enjoy making this Bottega Veneta inspired Intrecciato Weave by using quilting weight cotton or lightweight denim.
Enjoy weaving them!
Materials
- Quilting weight cotton fabric, or lightweight denim, quantity: approximately 5 times the amount called in the pattern.
- Steam-A-Seam 2 Double Stick Fusible Web-¼″ x 40 Yards. The pack comes in 2 rolls, I used 1 roll for this water bottle holder.
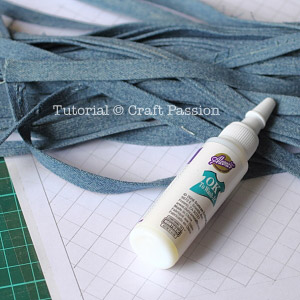
- Aleene’s Tacky Pack – 5PK, I used the permanent fabric glue that is safe to wash.
Tools
- Clover Bias Tape Maker – 9mm (⅜″)
- Awl or Pin, to push the fabric through the tape maker.
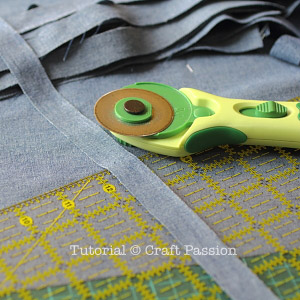
- Quilting Ruler, Roller Cutter and Cutting mat
- Iron
- Sewing pattern in paper
- Transparent adhesive tape/scotch tape
Instructions
MORE DETAILS ON HOW TO MAKE
FABRIC INTRECCIATO WEAVE
- Cut fabric into ¾″ strips along the vertical grain line.
The length depends on the longest diagonal measurement of your pattern.
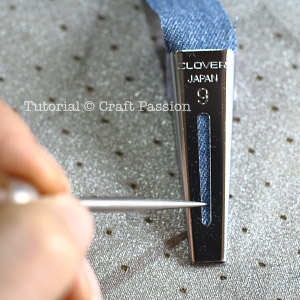
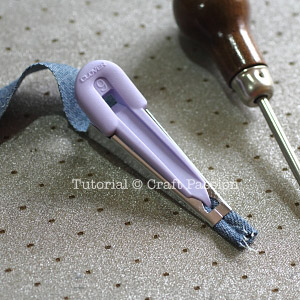
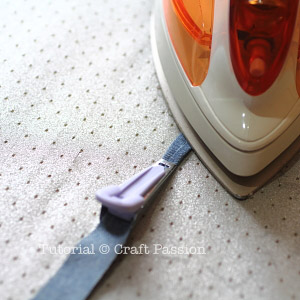
- With the bottom of the bias tape maker and the right side of the fabric facing up, insert the strip into the maker.
Use an awl or needle to push the strip through the mouth. - When the folded strip appears at the mouth of the maker, pull it out a little more with fingers.
- Press the folded strip with a warm iron. The iron must be warm enough to handle your fabric and create the fold crease.
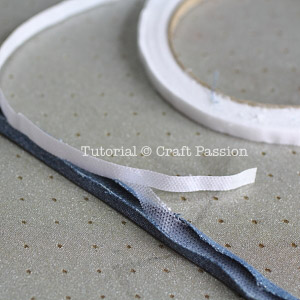
Pull the maker along the strip and move your iron along with it until you reach the end. - Peel off the backing of the fusible web and align it into the tape. Fold it back.
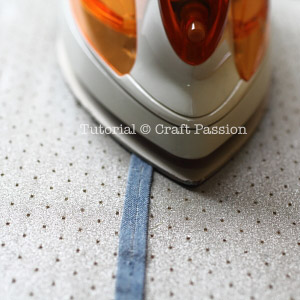
- Press with warm iron again to fuse the fold onto the strip/tape.
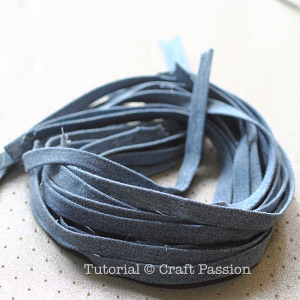
Trim off the fraying stray threads if they happen to jut out. - This is part of the strips I made before weaving.
The folds strongly adhere to the strips. - Prepare your sewing pattern by drawing 45º diagonal lines that are ⅜″ or 9mm apart. Repeat the same to draw the lines in the right angle direction.
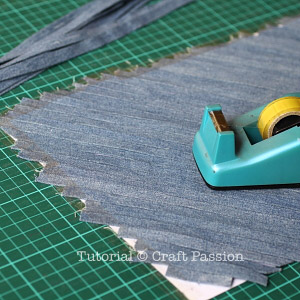
- Affix your sewing pattern on the cutting mat with adhesive tape at 4 corners.
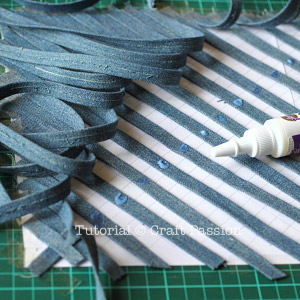
Cover the sewing pattern with strips line up in one direction and temporarily secure 1 end with adhesive tape.
Always work on the longest strip first, follow by the last long. If you don’t have enough short strip, just cut the extra length longer than the pattern.
Don’t use join strip. - Attach the working strip at the bottom left corner with adhesive tape.
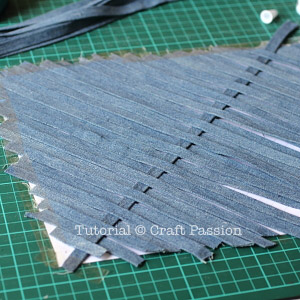
Pick and lift up alternate strips.
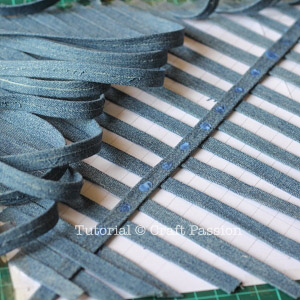
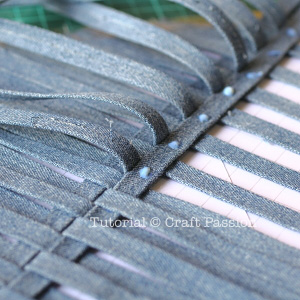
Put a dot of permanent fabric glue on each strip along the line that the working strip is going to sit on. - Lay and press the working strip along the line.
Put dots of permanent fabric glue on the working strip.
Place back the lifted strip and press for them to stick. - The first row of weaving with alternate strips on top and bottom.
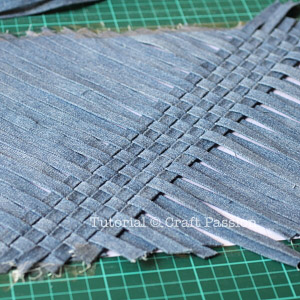
- Repeat the process by placing the second working strip, lift the bottom strips up, put glue on the top strip and press the working strip on it. Then put glue to the working strip and bring the lifted strip down and press on it.
Repeat the same for the rest. - Make sure that the working strip is within the diagonal lines drawn on the pattern.
Push them closely if necessary before the glue becomes too tacky to move.
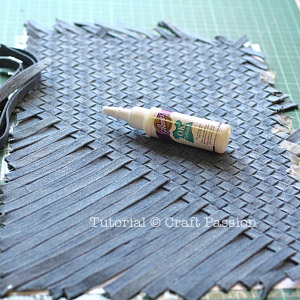
Always cut the extra length from the working strip and use it as a short strip when approaching the corner. - After you have worked the way down to the shortest strip, come back the one next to the first working strip you have started with.
Remove the adhesive tape you have put on earlier and work on that direction until you completely fill the pattern. - Leave the woven piece to set overnight so that the glue is completely dry for maximum bonding strength.
You can use this beautiful piece of intrecciato weave pattern to sew your project on the next day.
~~ Completed ~~
I sew a water bottle holder out from this beautiful Intrecciato Weave., here is the sewing pattern for the holder if you are interested to sew.
Notes
Get the full article at https://www.craftpassion.com/how-to-make-intrecciato-weave/
Recommended Products
As an Amazon Associate and member of other affiliate programs, I earn from qualifying purchases.



This is super cute! I don’t sew at all but this makes me want to learn
Wow, great tutorial! Will definitely try and use the method soon.
hola!!! esta padrisimo ese tabajo, me podrias comentar donde podria conseguir el aparato para poder doblar la tela gracias un abrazo!!!!
Translation (by Google):
Hello!!! This padrisimo that tabajo, could you comment me where could get the device to be able to bend the fabric thanks a hug !!!!
Sorry for the poor translation from Google, hope I am right to guess that you are asking about where to get the bias maker. Please click the link on the "Clover Bias Tape Maker – 9mm (3/8″)" at the tool section, it will bring you to Amazon website where you can buy it online. Otherwise, you will need to go to your local quilting shop to search for it.
I am obsessed with the look of this! And how many pairs of jeans (or partial jeans) do I have in my "make-something-with-this" pile? Love it, thanks for the great tutorial!
I used part of the jeans to make it. It depends on how big your project is to determine how many pair of jeans you will need. Note that the the fabric strips are cut in a diagonal direction of the fabric weave. Hope this info helps.
Great piece. Where can I buy the maker
It is from Clover, you can buy it from craft shop that carry Clover brand or you can get it from online shop.
moc se mi to líbí, hozužel nemáme tu ty pomocné udělátka
Translation (by Bing):
I really like it, we don't have those hozužel helper Widget
Hi Milena, may I know what is "hozužel nemáme"? Seems like the language translator didn't capture the word correctly.
I just recently found this post. Job well done!
I wanted to speak to the last post that asked about leather. I have done this several times with lamb skin and I just cut the strips 1/2" wide, using a quilting ruler. Since leather doesn't ravel, there was no need to run them through the folder, as you had to with fabric. I then used the same technique you used, gluing the strips down. When I was finished, I flipped it over and used my press to fuse low temp interfacing to the back, for stability. This last step may not be needed for every situation, but I was using mine to make yokes for a jacket and wanted the extra support.
OMG!!! You are AWESOME!!! Thank you, thank you, thank you *kissing your feet* See what I did after cracking my brain and wondering how to do the Intrecciato Weave thingy
http://houseofnodza.blogspot.com/2013/09/tolu-tote.html
Will attempt this with leather and show you when I do.
Q: Will the Clover Bias Tape Maker – 9mm (3/8″) work well with soft leather? I would like to know before I invest.
Thanks, Amina, but I think the soft leather is too thick to pass through the tape maker....
Hi,
Thanks for all these great tutorials! Just found this site today - just love it!
Just thought I should make you aware of one little error that snuck in here... You write that 3/8" equals 9mm. It doesn't. It is 10mm (or exactly 0.9525cm which rounds up to 0.96cm, which rounds up to 1cm or 10mm [calculated like this: (2.54cm:8)x3=0.9525≈1cm] )...
Just thinking... Over many strips, making them 9mm would make a difference, e.g. on the bottle holder finished size (e.g. if some do it without the 3/8"/1cm bias tape maker), using a metric ruler and 9mm wouldn't be a very good idea... 🙂
Again, thanks so much for all those great tutorials! I can't believe that you find time for it on top of another job and having kids! Fantastic!!! 🙂
Just thought I should mention it, so you at least know for later... 🙂
where to buy all the equipment, this project look very interesting!!!..do u buy 'em online or available in most craft stores..?
There are links on certain materials that you can buy online, click on them to get more info.
I'm thinking about "Bottega Veneta too..
It's look like " Bottega Veneta"!
Thank You!
Thanks, Florence. Have you seen the water bottle I made using this woven piece?
I love this tutorial. I wish you'd do more of them with video though. Thanks again.
Love the look of this. Is there a way to make a quilt like this or is it just to heavy? Not sure if you can cut length of fabric or only crosswise (selvage to selvage).
Very pretty and interesting.
Brenda M.
Brenda, it could be too stiff and heavy as a quilt, I am thinking that rag rug could be more suitable if you want to make something big for the house.
I cut the fabric along the direction of the selvage since you can get longer length from cut by length fabric, but you can basically cut any direction.
Happy trying out 🙂
It`s very cute!!
Thank you for the tutorial. Love this weave 🙂
her yaptığı çok güzel bayılıyorum sana hayranım
Translation (by Google):
I admire you so beautiful I love all his
Wow that is AWESOME just beautiful !!!!!!! I love it !!!!!! Thanks for the tut!!
What a great tutorial. I will put this on my list to make.
Beautiful!!!